
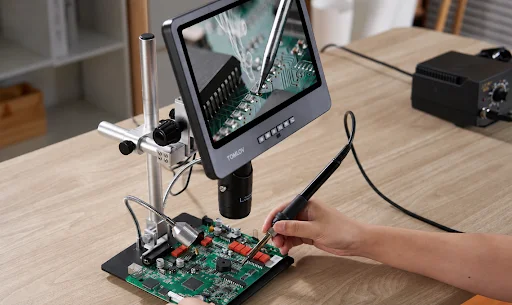
Perfecting a knife edge often feels like a guessing game when relying on the naked eye. Many struggle to understand why a freshly sharpened blade still feels dull. This guide eliminates that frustration by teaching you to use a digital microscope to inspect sharpening results. You will learn to set up your equipment, spot hidden defects, and refine your technique for a razor sharp finish.
How to Set Up a Digital Microscope
Proper equipment setup is the absolute foundation of an accurate blade inspection. Taking a few moments to prepare your workspace protects your fingers and ensures you get a crystal-clear view of the steel.
Choose a Practical Magnification Level
When working with knife blades, maximum magnification is rarely the best starting point. Zooming in too closely makes it incredibly difficult to understand which part of the blade you are actually looking at. A practical range of fifty to one hundred times magnification is usually perfect. This level gives you a clear view of the cutting edge while providing enough surrounding context to keep your bearings.
Clean the Knife Edge
Before placing any blade under the lens, you must wipe it down thoroughly. The sharpening process leaves behind metal swarf, stone grit, and oil mixtures. Under high magnification, this leftover sludge looks exactly like severe edge damage or micro chips. Wipe the blade with a soft cloth and a little isopropyl alcohol to reveal the true condition of the steel.
Secure the Blade Safely
Holding a sharp knife by hand while trying to focus a microscope is both frustrating and dangerous. Even the smallest hand tremors will blur the image on your screen completely. You should use a small vise, a specialized knife clamp, or a block of wood with a slit cut into it to hold the blade perfectly still. A stable setup ensures crisp images and keeps your fingers safely away from the edge.
Adjust the Lighting Angle
Lighting makes all the difference when inspecting a polished metal surface. Direct overhead light will create a blinding glare that hides scratches and edge geometry. Instead, position your light sources at a low angle from the side. A system like the Tomlov DM602 Pro 10.1 Inch HDMI Digital Microscope is ideal because its flexible side gooseneck lights let you cast shadows across the bevel, instantly revealing the true texture of the sharpened steel.
How to Inspect the Knife Edge
Inspecting a knife is a methodical process. A systematic approach guarantees you will not overlook any hidden damage or inconsistent grinding marks.
Start With Low Magnification
Begin every inspection session at the lowest possible optical setting. This wide view allows you to see the overall shape of the bevel and quickly locate the very edge of the knife. Once you have the blade centered on your monitor and clearly in focus, you can start your detailed evaluation without losing track of your position.
Scan From the Heel to the Tip
A proper inspection requires looking at the entire cutting surface rather than just a single spot. Slowly slide the secured blade under the camera, starting at the back heel and moving continuously toward the front tip. Watch the monitor carefully for any sudden changes in the scratch pattern or the width of the bevel, as these indicate inconsistencies in your sharpening angle.
Inspect Both Sides of the Edge
The sharpening process inherently pushes metal from one side of the blade to the other. If you only inspect the right side of the knife, you might completely miss a massive burr hanging over the left side. Always flip the knife over and evaluate the opposite bevel to ensure your work is symmetrical and perfectly centered.
Increase Magnification Around Problem Areas
As you scan down the length of the blade, you will inevitably spot areas that look slightly rough or unusually shiny. Stop moving the knife and gradually increase your magnification on these specific spots. Zooming in allows you to see if that bright spot is just a piece of lingering dust or a flat spot that requires more work on the stones.
What to Look for After Sharpening
Knowing what a well sharpened edge looks like is just as important as knowing how to find defects. You are looking for specific visual cues that indicate a successful grind.
A Continuous Apex
The primary goal of sharpening is to create a clean apex where the two side bevels meet perfectly. Under the microscope, this should look like a sharp, unbroken line running down the center of your screen. If the line appears clean and tight without any fraying or flat plateaus, you have successfully formed a true cutting edge.
Remaining Burrs
A burr is a microscopic flap of waste metal that clings to the apex after grinding. On a digital screen, a burr looks like a ragged, torn piece of aluminum foil hanging off the very edge of the blade. If you do not remove this wire edge, it will fold over during your first cut and immediately make the knife feel incredibly dull.
Chips and Rolled Areas
Damage takes two distinct forms on a knife edge. Chips look like jagged, dark bites taken directly out of the apex line. Rolls occur when the thin edge bends sideways, creating a shiny flat spot that reflects light straight back at the camera. Spotting these issues tells you exactly where you need to spend more time repairing the steel.
Uneven Bevels
Your scratch marks tell the story of your sharpening angle. The abrasive lines should extend completely from the shoulder of the bevel all the way down to the apex. If you see areas where the scratches stop halfway, or if the bevel suddenly gets twice as wide, your wrists were wobbling during the sharpening process.
How to Compare Sharpening Results
Tracking your progress prevents you from grinding away too much metal. Comparing before and after images is the most reliable way to measure your success.
Capture Images Before Sharpening
Memory is highly unreliable when trying to evaluate microscopic changes in steel. Before you ever touch the knife to a sharpening stone, place it under the lens and take a digital photograph. This initial image serves as your baseline, allowing you to accurately measure exactly how much damage you need to remove.
Use the Same Magnification and Lighting
When you check your progress, you must recreate the exact same viewing conditions. Changing the light angle or the zoom level will completely alter how the scratches and the apex look on your screen. Keeping your settings consistent ensures you are comparing the actual changes in the metal rather than a change in your camera setup.
Photograph the Same Edge Sections
To truly see your progress, you need to compare apples to apples. Pick a specific, easily identifiable spot on the blade, such as the exact middle of the belly or an inch from the heel. Take all your progressive comparison photos of this exact same section so you can clearly see the scratch pattern evolving over time.
Compare the Apex and Scratch Pattern
Pull up your previous photo and compare it to the live view on your monitor. You want to see the deep, aggressive scratches from your coarse stones being entirely replaced by the finer, tighter scratches of your finishing stones. More importantly, the apex line should look noticeably crisper and straighter than it did in the initial photograph.
What to Do Based on the Inspection
An inspection is only valuable if you use the information to improve the blade. Your microscopic findings will dictate exactly what you need to do next on the bench.
Remove a Remaining Burr
If your microscope reveals a lingering wire edge, you must remove it before using the knife. You can achieve this by performing very light, alternating strokes on your finest finishing stone. Alternatively, dragging the edge backward across a leather strop loaded with polishing compound will gently break the burr off, leaving a perfectly clean apex behind.
Correct an Uneven Bevel
When the screen shows a wavy bevel or scratches that miss the apex entirely, you need to correct your form. Go back to a medium grit stone and focus entirely on locking your wrists and maintaining a consistent angle. Use a permanent marker to color the edge, then check your progress under the lens to ensure you are now grinding the correct area.
Repair Chips and Flat Spots
Spotting chips or rolled sections means your sharpening job is not finished yet. You cannot simply polish a chip away. You must return to your coarse grinding stone and remove metal from both sides of the bevel until the damage is completely ground out. Check the microscope frequently to ensure you stop grinding the moment the chip disappears.
Stop When the Apex Is Clean
It is very easy to obsess over microscopic scratches and accidentally over sharpen your knife, wearing away valuable steel for no practical reason. Once the microscope shows a continuous apex free of burrs and chips, your job is done. A clean edge under the lens guarantees the knife will perform beautifully in the kitchen or the field.
Conclusions
Relying on a 3-Lens Microscope completely transforms the way you maintain your tools. By providing a clear and magnified view of your edges, this technology eliminates guesswork and highlights exactly what you are doing right or wrong on the stones. As you learn to spot burrs, evaluate scratch patterns, and correct uneven bevels, your sharpening skills will improve drastically. Consistent inspection guarantees you will achieve a professional, razor sharp edge every single time you maintain your blades.