When I started planning my wedding, I had one very clear vision: elegant, romantic invitations with beautiful calligraphy. What I didn’t have was the budget (or time) to hire a professional calligrapher. That’s when I discovered a calligraphy font generators, and honestly, it changed everything for me.
In this guide, I’m sharing my first-hand experience of using a digital calligraphy tool to design quick, affordable, and genuinely stunning DIY wedding invitations. If you want luxury aesthetics without the luxury price tag, this article is for you.
Why I Turned to a Calligraphy Font Generator Early in My Planning
Right at the beginning of my search, I came across a Calligraphy font generators, and it immediately felt like the perfect middle ground between handmade charm and modern convenience.
Instead of scrolling endlessly through generic fonts or struggling with design software, I could instantly preview elegant scripts that felt personal and wedding-worthy. Even better, I could test names, dates, and full invitation layouts in seconds.
From a bride’s perspective, that speed matters more than you realize.
What Exactly Is a Calligraphy Font Generator?
A calligraphy font generators is an online tool that transforms plain text into beautifully styled calligraphy fonts. Unlike traditional fonts you install on your computer, these tools let you:
- Type your text directly into a browser
- Instantly preview multiple calligraphy styles
- Customize spacing, weight, and flow
- Export designs for print or digital use with a tool like Say I do
For wedding stationery, this means complete creative control—without needing design expertise.
My First Attempt: Designing a Wedding Invitation in Under 30 Minutes
I still remember my first test run. I typed:
“Sara & Ahmed — Together with their families…”
Within seconds, I saw it rendered in graceful, flowing calligraphy. That moment sold me.
Using Wedding invitations using a calligraphy font generator, I experimented with different styles—classic scripts for formal invites and softer handwritten looks for RSVP cards.
The best part? I wasn’t locked into one style. I could tweak everything until it felt right.
H2: Why Calligraphy Fonts Are Perfect for Weddings
H3: They Instantly Add Emotion and Elegance
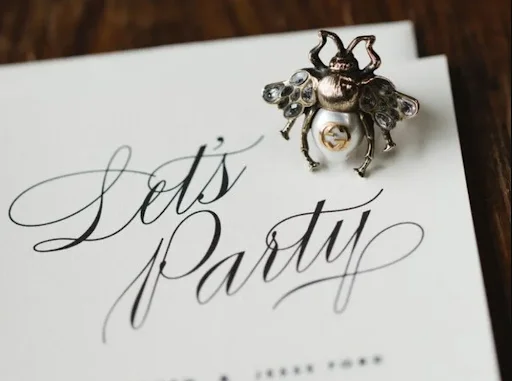
Calligraphy isn’t just decorative—it’s emotional. Flowing strokes and handcrafted curves subconsciously signal romance, tradition, and celebration. When guests open a calligraphy-style invitation, it sets the tone before they even read the details.
H3: They Work Across All Wedding Elements
Once I found a style I loved, I reused it everywhere:
- Invitations
- Save-the-date cards
- Welcome signs
- Seating charts
- Thank-you notes
This consistency made the entire wedding feel cohesive and professionally designed.
H2: How I Chose the Right Calligraphy Style (And You Can Too)
Not all calligraphy fonts feel the same. Here’s how I narrowed mine down:
1. Match the Font to Your Wedding Theme
- Classic or formal weddings → Traditional, flowing scripts
- Rustic or outdoor weddings → Looser, handwritten styles
- Modern weddings → Minimal calligraphy with clean lines
2. Test Readability at Different Sizes
Some fonts look gorgeous large but become hard to read when scaled down. I always previewed my text in both headline and body sizes.
3. Don’t Overdo Flourishes
One mistake I nearly made was choosing a font that was too decorative. Simpler calligraphy often feels more timeless and prints better.
H2: Step-by-Step: My DIY Invitation Design Process
Here’s exactly how I created my invitations using a calligraphy font generator:
- Drafted the invitation text in plain wording first
- Pasted it into the generator to preview multiple styles
- Selected one primary calligraphy font for names and headings
- Paired it with a clean serif font for details like time and venue
- Exported the final design for printing and digital sharing
Total time? Less than an afternoon.
H2: Real Benefits I Didn’t Expect
H3: Huge Cost Savings
Professional calligraphy can cost hundreds (sometimes thousands). My total expense? Essentially zero for fonts, and minimal for printing.
H3: Last-Minute Flexibility
When we changed our venue details, I didn’t panic. I simply edited the text and re-exported the design in minutes.
H3: A Personal Touch Without the Stress
Even though it was digital, friends and family kept asking, “Who did your calligraphy?” That felt incredibly rewarding.
H2: Pro Tips for Printing Calligraphy Invitations
From trial and error, here’s what I learned:
- Always print a test copy first
- Use thicker paper (250–300 GSM) to enhance elegance
- Avoid ultra-light ink colors for fine calligraphy strokes
- Leave generous margins so flourishes don’t get cut off
These small details made a big difference in the final result.
H2: Beyond Invitations: Creative Ways I Used Calligraphy Fonts
Once I got comfortable, I started using the generator for more than invitations:
- Custom envelope addressing
- Bridal shower signs
- Wedding website headers
- Instagram announcement graphics
It became one of the most versatile tools in my planning toolkit.
H2: Is a Calligraphy Font Generator Right for You?
If you value:
- Creative control
- Budget-friendly solutions
- Fast results
- A personalized wedding aesthetic
Then yes—absolutely. Especially if, like me, you want something beautiful without unnecessary complexity.
Conclusion: My Honest Take as a Bride Who Tried It
Looking back, using a calligraphy font generators was one of the smartest decisions I made during wedding planning. It gave me freedom, confidence, and results that genuinely felt special.
You don’t need to be a designer or a calligraphy expert to create elegant, heartfelt wedding invitations. With the right tool and a bit of experimentation, you can design something that reflects your story—beautifully and effortlessly.
If you’re standing at the start of your wedding journey, I highly recommend giving it a try. It might just become your favorite planning shortcut too.
Explore more expert content designed to spark curiosity and action at 2A Magazine.