Direct-to-film (DTF) printing has quickly become one of the most versatile and accessible methods for decorating garments, accessories and countless other products. It offers vibrant colours, sharp details and durability that rivals or even surpasses traditional techniques like vinyl and screen printing. If you’re new to this technology, this guide will walk you through what DTF printing is, which tools you need, how the process works and tips for getting professional results. By the end you’ll be ready to explore DTF printing overview or browse our collection to start producing your own projects.
What is DTF Printing?
In a direct‑to‑film system, artwork is printed onto a special film using textile inks. A polymer powder is applied to the wet ink and cured, creating a transfer that can then be pressed onto a garment or other surface. Unlike direct‑to‑garment (DTG) systems that print directly onto cotton fabrics, DTF transfers work on a wide range of materials, including cotton, polyester, blends and even denim and leather. DTF film absorbs almost every drop of colour, allowing for opaque whites and remarkably fine details. Many users find DTF prints comparable to—or more resilient than—screen printing for certain applications, with finished garments often lasting more than 50 washes when cared for properly.
Found this helpful? Check out a related post that expands the conversation.
Essential Tools and Materials
A basic DTF setup consists of the following items:
- DTF Printer – A dedicated printer capable of printing CMYK and white ink onto PET film. Industrial‑grade printers like those used by DTF Dallas produce photographic quality and consistent results.
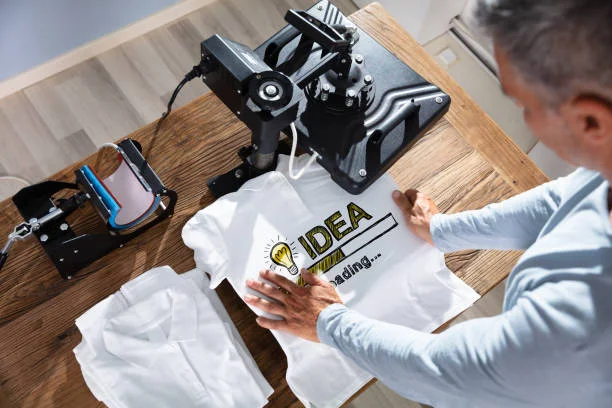
2. Heat Press – To transfer the design, you need a reliable press that can maintain temperatures around 280‑300 °F (155°160 °C) at medium pressure for 9‑13 seconds. For smaller projects, a household iron set to its highest setting can also work but requires longer press times.
3. DTF Film and Adhesive Powder – The film provides a smooth surface for printing; the powder melts into the ink to bond the design to fabric. DTF Dallas recommends PNG files at 300 DPI with transparent backgrounds and lines at least 0.5 mm thick to ensure sharp transfers.
4. Design Software or Online Builder – Although you can create artwork in programs like Adobe Illustrator or Canva, DTF Dallas offers an intuitive gang sheet builder that lets you upload and arrange designs without any specialised software.
The DTF Printing Process
Once you have your equipment, printing your first transfer is straightforward:
- Prepare Your Artwork – Upload a 300 DPI PNG with a transparent background to the gang sheet builder or your printing software. Make sure any fine lines are at least 0.5 mm thick and save in CMYK colour mode where possible to ensure accurate colour reproduction.
2. Print onto Film – The printer lays down CMYK colours followed by white ink. Because the film absorbs almost all the ink, you can create vibrant gradients and opaque whites.
3. Apply Powder and Cure – Sprinkle the polymer powder onto the wet ink and shake off the excess. The film is then heated to cure the powder, creating a sticky backing ready for transfer.
4. Press the Transfer – Place the film ink‑side down on your garment and use your heat press. For cotton and 50/50 blends press at approximately 282 °F for 9 seconds; synthetic fabrics need about 6 seconds. Use medium pressure and peel in one smooth, continuous motion (hybrid peel) either while hot or after it has cooled slightly.
5. Finish and Care – For enhanced durability, cover the print with parchment paper and press again for five seconds. Wait at least 24 hours before washing; turn garments inside‑out and wash in cold water on a gentle cycle. Avoid bleach and fabric softeners, and tumble dry on low.
Tips for Beginners
• Choose the Right Size – DTF Dallas offers transfers from 2×2 inches up to 22×24 inches and even larger gang sheets. For pocket prints use a 3×3 inch transfer, while an 11×11 inch is ideal for a standard front graphic. A gang sheet lets you combine multiple images efficiently and reduce waste.
• Mind Your Resolution – Print files at 300 DPI and keep fine lines at least 0.5 mm thick to avoid loss of detail.
• Store Transfers Properly – When stored in a cool, dry environment, unused DTF transfers can last 1‑2 years.
• Take Advantage of Same‑Day Service – DTF Dallas offers same‑day production when you upload print‑ready files before 11 a.m. CST and free shipping on orders over $100. They are open seven days a week and provide 24/7 pickup for local customers.
• Follow Aftercare Instructions – DTF prints are designed to withstand over 100 washes when you wait 24 hours before the first wash, avoid harsh detergents and wash inside‑out.
Conclusion
DTF printing opens up countless possibilities for small businesses, creatives and hobbyists. With the right tools and an understanding of the process, you can produce bright, long‑lasting prints on almost any fabric. Whether you’re making custom t‑shirts, tote bags or unique merchandising for clients, following the guidelines above will help you achieve professional results. When you’re ready to get started, visit dtfdallas or upload your design through the gang sheet builder to experience DTF Dallas’s premium prints and exceptional service.
Unlock new perspectives—explore more articles made for curious minds at 2A Magazine.