If you’re in the thick of newborn life, you already know this scene: the baby finally falls asleep on your chest, your coffee is ice-cold, and the dinner you worked so hard to prep is sitting on the counter, lukewarm at best. As a mom who has done the “reheat my meal three times and still never finish it” routine through cluster feeding and toddler chaos of Warming Command Center, I can tell you that warm, ready-to-eat food is not a luxury in the postpartum season. It is a survival tool.
That is where an all-in-one warming command center comes in. Instead of juggling the oven, microwave, stove, and random gadgets, you create one simple, safe, and efficient zone where meals, snacks, and drinks stay truly ready whenever you can finally grab a bite.
In professional kitchens, they rely on warming cabinets, drawers, and steam tables to keep food at safe, consistent temperatures between cooking and serving. Food safety experts at FoodSafety.gov and the USDA emphasize keeping hot foods at or above 140°F and out of the “danger zone” between 40°F and 140°F, where bacteria can multiply quickly. We can borrow those same principles, scale them down, and make them work for a cozy family kitchen.
This guide will walk you through what a warming command center is, how to choose the right equipment, how to use it safely with little ones in the house, and how to set it up so it actually simplifies your life instead of adding more clutter Warming Command Center.
Why Warm Food Matters Even More In The Newborn Months
Postpartum life has its own clock. You may plan to eat dinner at 6:00 PM, but a diaper blowout, a marathon nursing session, or a fussy witching hour can easily push that to 8:00 PM. Warm food that waits for you without drying out or drifting into unsafe temperatures makes a bigger difference than most people expect.
Food safety experts explain that perishable foods should not sit between 40°F and 140°F for long periods because bacteria like Salmonella and E. coli multiply quickly in that range. FoodSafety.gov and other guides note that hot foods should stay at 140°F or hotter, and that leaving food out at room temperature longer than about 2 hours (or 1 hour on a very hot day above 90°F) increases the risk of foodborne illness. That matters for everyone, but especially when your body is healing and your immune system and sleep are stretched.
Now layer on the emotional side. Warm meals make you feel cared for. They are easier to digest, especially soothing soups and stews during postpartum recovery. They support breastfeeding by making it easier to eat enough calories and stay hydrated. When your food is waiting for you, instead of you chasing it, your mental load drops.
Imagine this: you bake a big pan of lasagna at 4:30 PM. Instead of cutting a square, letting the rest sit on the counter, and worrying about whether it is still safe at 7:00 PM, you slide the pan into your warming center. It stays hot, moist, and ready. Whenever you and your partner finally sit down between feeds, you can scoop, eat, and go right back to the baby without starting from scratch.
What Is An All-In-One Warming Command Center?
An all-in-one warming command center is a dedicated zone on your counter or near your range where everything related to warming and holding food lives Warming Command Center. It is less about buying a specific brand and more about borrowing the logic of a restaurant line and turning it into a calm, family-friendly station.
In commercial kitchens, heated holding cabinets, drawer warmers, and steam tables are defined as appliances that keep fully cooked food hot and safe between preparation and service. They do not cook the food; they maintain temperature and quality so dishes can be served together. Manufacturers describe them as the bridge between cooking and eating, and they are designed to hold hot foods above about 135–141°F, safely above the danger zone Warming Command Center.
Your home warming command center is the same idea in miniature. It usually includes three elements:
A primary warming device. This might be a built-in warming drawer, a countertop warmer, a slow cooker on Warm, or a sturdy insulated serving dish.
A landing zone. This is a clear patch of counter for heat-safe dishes, plates, and cups, so you are not balancing hot pans between baby bottles and pump parts. This is also a great place to stage other tools, such as a multifunctional bottle warmer, which can handle defrosting milk or sterilizing pacifiers alongside a simple bottle reheat.
A simple family rule set. Everyone knows that leftovers for the late-working partner, the postpartum soup, and the snack tray live here when they need to stay warm.
On a practical level, when your partner finishes cooking at 5:00 PM, they move food straight into the warmer instead of leaving pots on the stove. When you get ten free minutes at 6:30 PM, you already know where your hot plate is. No searching, no extra reheating, no “Is this still safe?”
Borrowing From Pro Kitchens Without Turning Your Home Into A Restaurant
Foodservice manufacturers like FWE and RestaurantWarehouse describe three big ideas that make commercial warming equipment so effective: precise temperature control, good insulation, and moisture management.
Precise control matters because holding foods just above 140°F keeps them safe but avoids overcooking. Many professional cabinets and steam tables use thermostats and digital displays, and some add alarms if temperatures drift. Insulated cabinets and drawers hold heat longer and use less energy than non-insulated ones. Humidity control, whether through water pans or moisture systems, prevents foods from drying out during longer holds.
At home, you do not need a full-size heated holding cabinet, but these same principles guide good choices. A warming drawer with a clear temperature range, a slow cooker that reliably keeps food hot without boiling it to death, or a well-designed insulated server that keeps casseroles warm for hours can all become the heart of your command center Warming Command Center.
For example, consider a big pot of postpartum chili. If you reheat individual bowls in the microwave three times a day, you are constantly babysitting timers and dirtying extra dishes. If you heat the pot thoroughly once on the stove and then transfer it to a slow cooker on Warm or a well-insulated thermal dish, you can safely ladle out portions over several hours with far less energy and attention. You are borrowing a restaurant-style “cook once, hold safely” mindset in a way that fits your home.

Choosing The Heart Of Your Warming Command Center
The key decision is which warming tool will be the “engine” of your station. There is no one right answer. It depends on your kitchen layout, budget, and how you like to cook. Here are the main options, grounded in how warming equipment is used in both homes and professional settings.
Option 1: Built-In Warming Drawer
A warming drawer is a built-in or standalone appliance designed to keep cooked food at serving temperature without further cooking it. Some ranges include one at the bottom; others are separate units installed in cabinetry. Thor Kitchen describes their warming drawer as maintaining food temperature in a range of about 86°F to 185°F, with typical home use instructions recommending preheating to around 120–200°F, placing food in oven-safe dishes, avoiding overcrowding, and holding for about 1–2 hours for best quality and safety.
For a postpartum household, a warming drawer can be a quiet workhorse. You can cook a casserole at nap time, then slide it into the warming drawer. You can tuck plates in there so dinner stays hot on warm dishes, a trick restaurants use to keep meals warm on their way to the table. Some drawers, like the ones Thor Kitchen describes Warming Command Center, even offer humidity control to keep food moist, and multiple modes for delicate tasks like dough proofing versus higher heat for dishes and towels.
Pros include a sleek, always-there solution that does not clutter counters, the ability to warm dishes and even towels, and relatively even heat that keeps food safe and appealing. Cons are the need for installation and upfront cost, and the reality that once it is built in, it is not portable.
Imagine hosting grandparents when the baby is two weeks old. You could bake a big pan of baked ziti and some roasted vegetables in the afternoon, then keep both in the warming drawer. When visitors trickle in over a two-hour window, everyone gets a hot plate without you hovering over the stove or reheating individual servings.
More value awaits—explore related posts tied to this topic.
Option 2: Countertop Food Warmer Or Buffet Server
Countertop warmers and buffet servers are like tiny versions of the buffet equipment used in hotels and cafeterias. Industry guides describe them as compact cabinets or open warming trays that hold pans of cooked food at safe serving temperatures. Restaurant-focused sources emphasize that, just like larger holding cabinets, they are designed to keep food above about 135–141°F and often use either dry radiant heat or a water bath (a Bain-Marie style) to maintain temperature and moisture.
For a family, a simple countertop warmer can hold a pan of enchiladas, a pot of oatmeal, or a tray of roasted vegetables. Some party and catering guides recommend preheating these units for 20–30 minutes, then keeping lids on to maintain moisture and checking temperature with a thermometer to ensure hot foods stay at or above 140°F.
The biggest advantage in a mom-and-baby kitchen is flexibility. You can pull the warmer out when you are batch cooking freezer meals or hosting visitors, then tuck it away when you are back to simpler days. It also shines during holidays: you can cook sides ahead and keep them piping hot while the turkey or main dish takes over the oven Warming Command Center.
The trade-offs are counter space, cords, and hot surfaces to manage in a house where little hands will one day reach everything. Choosing a model with stable, non-slip feet and cool-touch handles, features that commercial buyers look for to prevent tip-overs and burns, is worth prioritizing.
Option 3: Slow Cooker Or Multi-Cooker On Warm
Several home-hosting guides describe slow cookers and rice cookers as low-effort warming stations when set to Low or Keep Warm. They are particularly recommended for chili, shredded meats, dips, soups, and other moist dishes that can safely sit hot for hours. Food safety articles make an important point: slow cookers should be used to hold food hot only after it has been fully cooked, and kept plugged in so internal temperatures stay above 140°F.
For a postpartum parent, a slow cooker might already be your best friend. Turning it into the core of your warming command center is often the lowest-cost approach because you likely own one. You can cook steel-cut oats overnight and keep them on Warm for the entire morning rush. You can simmer bone broth or postpartum soups and leave the pot at safe serving temperature while you feed the baby.
The pros are clear: extremely hands-off heat, excellent moisture retention, and the ability to keep food warm for a long stretch without constant stirring. The downsides are that it is better suited to wet dishes than crispy ones and that the crock and lid can be heavy for postpartum bodies, so think ahead about where it will sit.
As a simple example, if you make a 3-quart pot of hearty lentil soup in your slow cooker, that is about 96 fl oz. If each adult in your home eats a 12 fl oz bowl at lunch and again at dinner, you can get roughly eight bowls over two days. Cook once, hold it safely on Warm for lunch and dinner the first day, then chill leftovers quickly in the evening for the next day’s meals.
Option 4: Insulated Thermal Serveware
Insulated serving dishes and thermal carriers are popular in party and catering circles because they hold heat without any power at all. Host-focused guides describe them as double-wall or vacuum-insulated containers with tight lids that can keep soups, stews, pasta, and casseroles hot for several hours. Some products pair an insulated dish with a travel bag for easy transport to potlucks and tailgates.
For a baby-centered home, insulated serveware is beautiful for situations where you do not want cords or hot burners within reach, such as on a coffee table near the couch or in a bedroom sitting area. You can fill an insulated casserole with mac and cheese at dinnertime and let the older kids serve themselves while you nurse. You can keep a thermal carafe of hot cocoa or herbal tea warm through a long winter afternoon.
The biggest advantages are safety and portability: no plugs, no open flames, and you can carry it to whatever room you are camped out in with the baby. The limitation is that these containers do not actively add heat, so they may slowly drop in temperature and can sometimes over-soften or continue to cook delicate foods if they are extremely efficient. They are best when you plan to serve the food over a couple of hours, not all day.
Here is a quick comparison to anchor your choice.
| Warmer type | Best for | Biggest pros | Watch-outs for parents |
| Built-in warming drawer | Regular family dinners and entertaining | Always ready, sleek, can warm dishes and towels | Upfront cost, not portable, needs careful childproofing |
| Countertop warmer or buffet server | Parties, holidays, batch-cook days | Holds multiple pans, restaurant-style temperature control | Takes counter space, hot surfaces, cords to manage |
| Slow cooker or multi-cooker on Warm | Soups, stews, shredded meats, oats | Many homes already own one, very low effort, moist heat | Not for crispy foods, crock can be heavy to move |
| Insulated thermal serveware | Power-free holding and casual grazing | No cords, safe to move to the couch or bedroom, great for transport | Does not add heat, best for shorter holding windows |
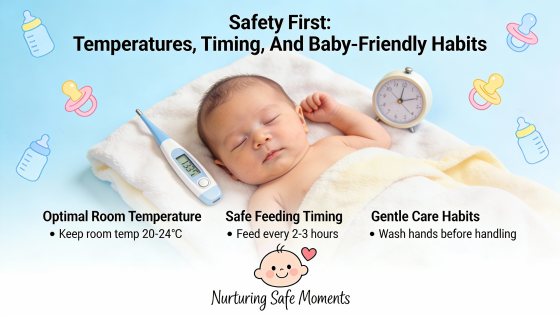
Safety First: Temperatures, Timing, And Baby-Friendly Habits
Any time we talk about warm food around babies and young children, safety has two layers: food safety (avoiding illness) and physical safety (avoiding burns and fires). The good news is that the same habits that protect your family in one area usually support the other.
Understanding The “Danger Zone” In A Family Kitchen
FoodSafety.gov and multiple hosting guides explain that bacteria grow fastest between 40°F and 140°F. To keep foods safe, they recommend holding hot dishes at or above 140°F and limiting how long food sits at room temperature. One party guide describes a handy “2-2-2” leftovers rule: keep food out at room temperature for at most 2 hours, store cooked leftovers in the fridge for up to about 2 days, and keep them in the freezer for around 2 months.
For a postpartum family, these numbers translate into simple routines. When dinner is ready, you move it straight into your warming device if anyone will be eating within the next couple of hours. If you know you will not get to it until much later, you cool and refrigerate promptly instead of letting it drift along on the counter. If hot food has been sitting in a warmer for several hours and you are not sure it has stayed safely hot, you treat quality and safety conservatively rather than stretching it an extra day.
Picture this: you make a large chicken and vegetable bake at 5:00 PM. You put half into your warming drawer, preheated to about 160–180°F, for your own dinner and your partner’s plate when they get home at 7:00 PM. At 7:30 PM, the rest goes into shallow containers in the fridge instead of sitting out “just in case.” That small habit keeps your kitchen away from the gray zone where time and temperature become fuzzy.
Using Warmers For Holding, Not Cooking
One of the clearest points food safety organizations make is that warming tools are for keeping already cooked foods hot, not for cooking them from cold. FoodSafety.gov specifically notes that chafing dishes, steam tables, warming trays, and slow cookers in a serving line are meant to hold food that has already been brought to a safe internal temperature, not to reheat chilled food from the fridge or freeze.
Commercial warming cabinet manufacturers say the same thing: their cabinets and drawers are designed to pause the cooking process and hold foods at serving temperature, not to bring cold items all the way up.
At home, that means you heat your food completely on the stove, in the oven, or in a cooking mode on your multi-cooker until it is steaming hot and safe. Then you transfer it to your warming drawer, warming tray, insulated server, or slow cooker on Warm. Once you are finished with the meal window, you either refrigerate leftovers promptly or, if the food has been held hot for a long time, you let go of what you truly will not use.
For example, if you have a postpartum lasagna in the fridge, you would reheat it in the oven until the center is fully hot, then place the pan in your warming drawer or warmer to hold it through the dinner hour. You would not place the cold glass dish straight into a warming drawer set to a modest holding temperature and expect it to reach safe internal temperatures quickly enough.
Burn Safety And Little Hands
Professional guidance around heat lamps and holding cabinets emphasizes placing equipment where it supports workflow, keeping a fire extinguisher nearby, and turning units off after service to reduce fire risk. For a family kitchen, the safety lens widens to include curious toddlers and sleep-deprived parents.
Some practical choices drawn from commercial best practices translate well:
Choose stable, well-built equipment. Restaurant buyers look for solid bases, non-slip feet, and cabinets that can be securely fastened or leveled. At home, that means your warmer should not wobble when you bump into the counter with a baby on your hip.
Favor cool-touch handles and insulated doors when possible. Equipment guides highlight these features as key for preventing burns for staff; the same is true around young children who might brush by.
Place units away from traffic paths. In buffets, planners map guest flow so nobody collides at the station. In your kitchen, that looks like positioning the command center away from the main walkway where siblings race through, and away from the edge where a cord could be pulled.
Turn warmers off once the meal window is over. Commercial operations are advised to power down heat lamps and strip warmers as soon as service ends. At home, it is a good habit to treat your warmers the same way so you are not leaving heating elements on while you sleep or run errands.
How Long Can You Hold Food When You Are Exhausted?
Even when food stays above 140°F, quality starts to change if it sits out too long. Party and buffet guides note that while food safety can be maintained, flavor and texture usually decline after around 4 hours in warmers. Sauces can separate, vegetables can lose their bite, and meats can dry out.
That is why many caterers and buffet operators rotate pans regularly, top up water in steam tables to maintain moisture, and plan to fully cool and refrigerate or discard food after a limited holding period rather than running it from lunch through dinner.
For a new parent, the simplest approach is to plan your warming window intentionally. If you tend to eat in a three-hour band around dinner, aim to hold food hot for that window only. If you expect to snack all afternoon, warm and hold a smaller portion in your center and keep the rest safely chilled to reheat later.
The 2-2-2 idea can be a helpful mental anchor, even if you do not apply it in a rigid way. You think in terms of a couple of hours at room or serving temperature, a couple of days in the fridge, and a couple of months in the freezer for many cooked dishes. The exact times you use for your household can be guided by your pediatrician’s and healthcare team’s advice, but the core principle is clear: respect time and temperature, and avoid living in the gray zone of “this has kind of been sitting here all day.”
Designing A Command Center That Actually Simplifies Your Counter
The best warming station is not the fanciest one; it is the one your tired brain can operate on autopilot. Borrowing a bit from buffet layout strategies and commercial kitchen planning helps keep your setup intuitive.
Picking The Right Spot
Buffet and catering guides suggest planning around space, obstacles, and traffic flow. They measure the room, note pillars, and design a logical path from appetizers to desserts. In your home, the “venue” is your kitchen, and the main obstacles are strollers, trash cans, and maybe a dog bed.
Start by looking for a spot with three features: a nearby power outlet if you are using an electric warmer, enough clearance that you can open lids and drawers fully, and a location that does not intersect the main doorway or the “kid highway” between fridge and table. Commercial installers are also advised to consider circuit capacity and avoid overloading outlets, a good reminder to keep high-draw appliances like microwaves and warmers from sharing the same overtaxed power strip.
In a small apartment, that might be a single stretch of counter between the sink and stove, cleared of everything except your slow cooker and a stack of heat-safe dishes. In a larger kitchen, it might be a short sideboard or rolling cart positioned near the dining table so you can serve yourself while rocking the baby in a nearby chair.
Building A Simple “Warming Workflow”
Once you choose the spot, the goal is to make your warming center feel like a natural part of your day, not a special project. Commercial chafing station guides recommend pre-testing equipment, assigning roles, and keeping backup pans ready for fast swaps. At home, you can adapt those ideas in a softer way.
In the morning, you might fill the slow cooker with oatmeal and set it to cook before school drop-off, then switch it to Warm so it is ready for anyone who drifts through the kitchen. At midday, you can reheat your lunch, portion a serving into a small oven-safe dish, and keep it in the warming drawer while you nurse, knowing it will still be warm when you get back. In the evening, your partner might take over cooking and automatically move finished dishes into the warmer, so “Dinner is ready” really means “Dinner will still be hot when you sit down.”
A tiny bit of planning with containers helps, too. If your primary warmer fits a standard 9 by 13 in dish and a couple of smaller pans, you can divide meals into those sizes for easy swapping. Instead of one giant pot of stew on the stove, you might keep a family-size portion in a shallow pan in the warmer and the rest in the fridge for another day, reducing how often you are tempted to tempt fate with room-temperature holding.
Keeping Energy Use And Cleanup Manageable
Commercial kitchen efficiency articles note that roughly a large share of a kitchen’s operating budget can go to energy, so they recommend insulated equipment, turning units off when not in use, and regular maintenance. While your home kitchen is on a very different scale, the mindset carries over.
Choosing a warmer with decent insulation and a tight-fitting lid or door means it will use less energy to hold temperature and will recover heat more quickly when you open it to serve. Energy-efficient designs described in warmer buyers’ guides often include modern heating elements, good gaskets, and even energy-saving modes. You do not need every bell and whistle, but noticing whether your device holds heat well and does not feel excessively hot on the outside is a good sign.
Operationally, simple rules help. Turn your warming device on only when you actually have food to hold, not out of habit. Keep lids on and drawers closed so you are not constantly losing heat. Many commercial best practices stress that overloading warmers or blocking airflow can lead to uneven heating and wasted energy; at home, that means giving dishes a bit of space instead of stacking everything tightly.
For maintenance, foodservice guidance recommends wiping down interiors and exteriors with mild, non-abrasive cleaners after each use, avoiding harsh scouring that can damage stainless steel, and periodically checking cords, seals, and thermostats. In a family setting, that might look like a quick routine at the end of the evening: turn the warmer off, remove pans for soaking, wipe the interior once while it is still slightly warm (but not hot), and give cords a quick visual check. The easier this is, the more likely your future sleep-deprived self will actually do it.
A Day-In-The-Life With A Warming Command Center
Sometimes it helps to see how this plays out in real life. Picture a day with a three-week-old baby and a toddler at home.
In the morning, you add oats, water, and cinnamon to the slow cooker before your partner heads to work. By the time the toddler is up, the oatmeal is ready. You scoop a bowl for them, switch the cooker to Warm, and leave it there so you can have your own serving after nursing without reheating. At ten o’clock, while the baby naps in the carrier, you quickly clear the command center counter and set out two heat-safe bowls and spoons for later.
At lunchtime, your friend has dropped off a casserole. You heat a portion thoroughly in the oven, then slide the pan into the warming drawer set around a medium holding temperature. You eat half your serving before the baby needs you again, and you keep the rest in the drawer. Forty minutes later, when you finally get back to it, your food is still warm, not congealed or cold.
In the late afternoon, you reheat a small pot of soup on the stove until it is steaming and then transfer it to an insulated thermal dish in your command center. Over the next two hours, you and the toddler dip in and out for small bowls as energy dips, with no additional burners on and no pot lingering on the stovetop.
By dinner, your partner has roasted chicken thighs and vegetables. As each tray comes out of the oven, it goes straight to the warming drawer instead of the counter. You do bath and bedtime with the toddler while your partner rocks the baby. At the end of everything, when you finally sit together at the table, your plates come from the warming drawer hot, safe, and ready. No one touches the microwave. No one has to ask whether it is okay to eat.
The result is not perfection. There are still crumbs, laundry, and a baby who will not read the schedule. But one corner of your kitchen is working quietly in your favor, catching all the moments when you have to step away.

Frequently Asked Questions About Warming Command Centers
Can I Use A Warming Drawer Or Warmer For Baby Bottles Or Breastmilk?
The warmers described here are designed and tested for holding fully cooked foods in heat-safe dishes at serving temperatures similar to restaurant service. Baby bottles and expressed milk have their own specific safety and handling guidelines. Many families choose to warm bottles using dedicated baby bottle warmers or gentle water baths designed for that purpose. The safest approach is to use your warming command center as a staging and organization zone for bottle-warming tools and supplies, while following your pediatrician’s or lactation consultant’s instructions and the bottle and pump manufacturers’ guidance for how to warm and store milk.
Why Not Just Use My Oven On Warm?
Standard ovens can absolutely act as simple holding stations. Home-hosting guides often recommend setting an oven to around 170–200°F or using a Warm setting to keep casseroles and baked dishes hot for a short time. The challenge is that ovens are not designed for precise long-term holding, especially for small portions, and they can dry food out or overcook it. They also tie up a large appliance you might want for actual cooking. Dedicated warming tools, whether a drawer, slow cooker, or thermal server, are designed to keep foods hot without continuing to cook them aggressively, often with better moisture retention and energy use. For occasional use, an oven on Warm is enough; for daily postpartum rhythms, a smaller, focused warmer is often kinder to your food and your energy bill.
What If I Have A Tiny Kitchen?
The beauty of the warming command center concept is that it scales. In a very small kitchen, your “center” might be nothing more than the spot where your slow cooker lives and a clear square foot of counter for a cutting board and a couple of plates. Party guides describe tabletop warmers as “small but mighty” because even a single compact unit can transform how food flows in a crowded space. The same is true at home. You do not need a built-in drawer or a whole buffet line. You need one reliable warmer, one predictable spot, and a few habits that keep food moving quickly from stove or oven to holding to fridge.
A Gentle Closing Thought
Postpartum life already asks you to do the impossible: care for a tiny new human while your own body and mind are healing. Creating a warming command center is not about becoming more productive or “doing it all.” It is about letting your kitchen quietly care for you while you care for everyone else. With a little planning, a safe, warm plate can be waiting for you at the moment you finally exhale, and that is a gift every new parent deserves.
Explore more and uncover ideas designed to broaden your thinking at 2A Magazine.