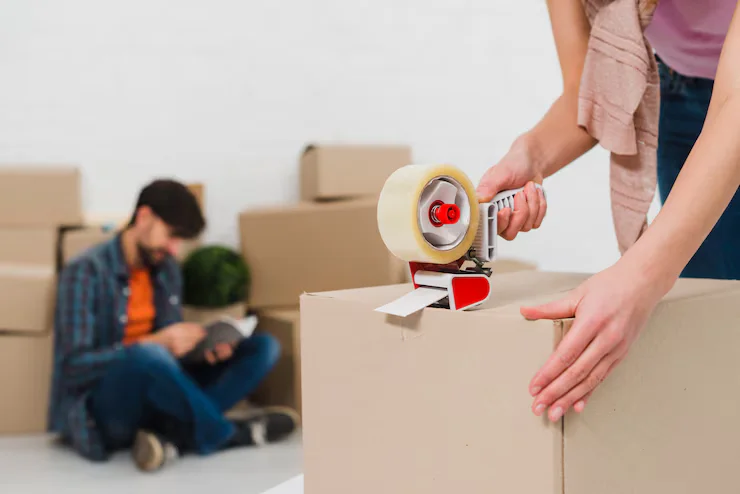
Proper care and efficient use of packaging tape guns ensure they work well when sealing boxes. Think of these tools as pets; a little attention goes a long way in ensuring they operate at their peak performance. They need regular upkeep to keep working at their best.
Remember to clean regularly, adjust the tension for a smooth finish, and always change the blade safely. Proper care adds years to your tape gun’s life and makes it work better. Regular cleaning really helps your tape gun work better. Let’s see how.
Regular Cleaning Routine for Tape Guns
Starting with a regular cleaning routine for your tape gun ensures it stays in top shape. First, unload the tape and check for any residual adhesive inside the dispenser track; this can build up over time. Use a damp cloth to wipe down both the exterior and interior surfaces gently but thoroughly.
Remember, dust or debris on the blade can dull its effectiveness, so pay extra attention here, ensuring it’s clean for smooth cutting. For stubborn residue or gunk around the roller or blade area, using rubbing alcohol on a cotton swab often does the trick without harming components. Whether you’re learning how to use packaging tape gun tools or maintaining a well-worn favorite, following these steps regularly will not only prolong your tape gun’s lifespan but also ensure every seal you make is secure and neat.
Adjusting Tension for Optimal Application
- Identifying Tension Needs: The first step is knowing your tension requirement. Different packaging materials require varying degrees of tightness for an optimal seal. Lighter boxes benefit from moderate tension, whereas heavier parcels need it tighter to prevent breaks in transit.
- Adjusting the Knob: Find the adjustment knob usually located at the side or top of your tape gun. Turning it clockwise increases tension, making the tape pull more tightly around packages. Conversely, turning it counter-clockwise will loosen it for a gentler application on lighter items.
- Testing and Retesting: After you’ve made adjustments, test them out before going into full packing mode. Use a small piece of cardboard to see how well the tape sticks under new settings; this prevents waste and ensures reliability during bigger jobs.
Replacing the Blade Safely and Efficiently
Before replacing the blade on your packaging tape gun, ensure it’s detached from any tape rolls. You’ll want to wear safety gloves to protect your hands during this process. Find the small screw that holds the blade in place and carefully unscrew it using a Philips head screwdriver.
Once loose, remove the old blade by sliding it out gently and dispose of it safely to avoid accidents. Slide the new blade into position, making sure its orientation aligns with how the previous one was fitted. Finally, reattach and tighten the screw securely so that everything stays in place when you resume work.
Taking care of your packaging tape guns ensures they last longer and perform better. Always clean the blade and roller after use to prevent adhesive build-up, which can cause jams or slow performance. Regularly check for loose parts and tighten them to avoid unexpected breakdowns during operation.
Lubricate moving parts occasionally to maintain smooth action. Store in a dry place to prevent rusting or corrosion of metal components. By following these simple steps, you’ll extend the life of your tape guns, making packing tasks easier and more efficient over time.