Who doesn’t love nails that look perfect, staying chip-free for weeks? Gel polish has just completely changed the rules of doing one’s manicure. It offers your nails a really shiny, durable finish, like going to a salon manicure.
And the best part? You don’t have to invest hours or much money at the salon to get that perfect look. You can do all this at home with just a few simple steps and the right tool to give you salon-quality gel nails.
So, whether you’re getting ready for a special event, pampering yourself, or love having pretty nails, doing your gel manicure can be fun and easy. It might seem tricky at first, but do not worry. With some practice and patience, your nails will look great in no time.
Below are some steps to achieve salon-quality nails with gel polish at home.
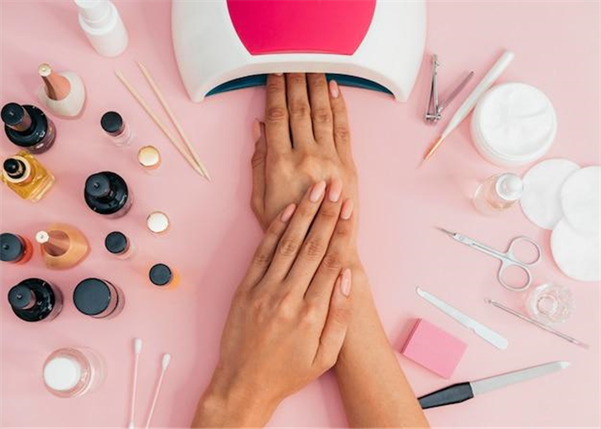
1. Gather Your Supplies
First, you will want everything you need to complete your gel manicure together. This is because it’s much easier to do this if you have everything in one spot, so the process doesn’t feel like a chore or stress on your time. You will need:
- Nail file and buffer: These shape your nails and smooth the surface.
- A cuticle pusher or orange stick will help push your cuticles back and give you a clean base with which to work.
- Lint-free wipes are necessary since ordinary tissues or cotton pads may leave their fibers on your nails.
- Nail cleanser or rubbing alcohol will clean your nails and remove any oils.
- UV or LED lamp: You will use this to cure or dry the gel polish.
Additionally, investing in high-quality products is also a good idea, as they make the manicure last longer and look better. You might also consider using biab nails for a soft gel overlay that enhances the natural look of your nails.
2. Prep Your Nails
Proper nail prep is the key to making your gel manicure last, as skipping this step can cause the polish to lift or chip, so take your time. Furthermore, proper preparation of the nails will make the gel manicure last; therefore, this step should not be skipped.
Thus, first, cut your nails to your desired length. Also, shape them using a nail file; make the tips square, almond, or round. Next, gently buff the surface of each nail with a buffer; this takes the shine off and allows the base coat to adhere more effectively. After having shaped and polished, proceed to work on your cuticles.
3. Apply the Base Coat
The base coat is one of the most critical steps in your gel manicure. It helps the gel color adhere to the nails and avoids discoloration. Thus, not using a base coat or improper base coat application makes your manicure less durable.
Therefore, apply a thin, even layer of base coat to each nail, trying not to get polish on your cuticles or skin. If you do, clean it off immediately with a small brush or orange stick. This helps prevent peeling later.
Similarly, cure your nails under the UV or LED lamp after applying the base coat. Follow the instructions for how long your product takes. It usually takes 30 seconds to two minutes for most curing, so don’t rush this step.
4. Apply the Gel Color
Now, the fun part is adding color! You have to be very patient and accurate for a salon-like finish.
First, shake the bottle of gel polish to mix the color. Then, apply a thin layer of gel polish to each nail. Thin layers are crucial because thick ones can cure unevenly or form bubbles.
To apply, use the “three-stroke method.” Start with one stroke down the center of the nail, then add strokes on each side. Try not to get any polish on your cuticles or skin. If you do, clean it immediately with a small brush dipped in acetone or an orange stick.
After applying the first coat, put your nails under the lamp. You can use a second coat for a more vibrant and even color if necessary. The secrets are thin layers and curing after each layer!
5. Seal with the Top Coat
Applying top coat is the final step in setting your manicure. It adds shine to your nails and seals the color, preventing chipping. Without it, your manicure won’t last as long. Apply a thin and even layer of top coat to each nail. Cover the whole nail surface, including the edges. And don’t forget to “cap” the tips of your nails by brushing the polish over the free edge; this helps prevent chips.
For example, base and color do not get a top coat on your cuticles or skin. If you do, clean it off ASAP using a brush or orange stick before curing. Lastly, cure the top coat under your UV or LED lamp for the recommended time listed on the product.
Wrapping Up
While it may seem complicated, achieving salon-quality gel nails in the comfort of your own home is easier than you think. The proper tools, easy steps, and some practice are all it takes to get a professional manicure that results in the comfort of your own four walls.
Moreover, doing your nails will save you time and money. But most satisfying of all, you’ll feel like creating a great piece of vanity. The more you practice, the better and quicker you’ll get. That at-home gel manicure will soon become a tremendous self-care ritual for you.
So, what is the wait for? Set up your nail station, pick your favorite color, and get creative with creating stunning gel nails.