Transporting your bikes safely and efficiently is essential for cyclists who love road trips, camping, or weekend adventures. A hitch bike rack or a hitch mount bike rack is one of the most reliable ways to carry bikes without sacrificing space inside your vehicle. But to get the most out of your rack, you need to know how to install it correctly, keep it in great condition, and use it safely. In this guide, we’ll cover everything you need to know to get the best experience with your rack and ensure your bikes stay secure on every trip.
Why choose a hitch bike rack or hitch mount bike rack
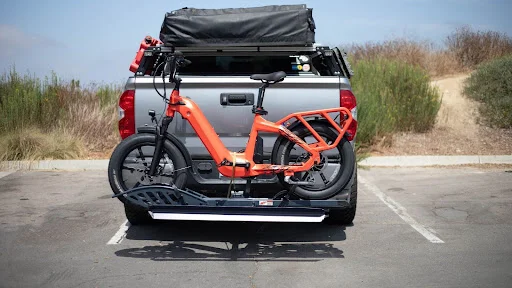
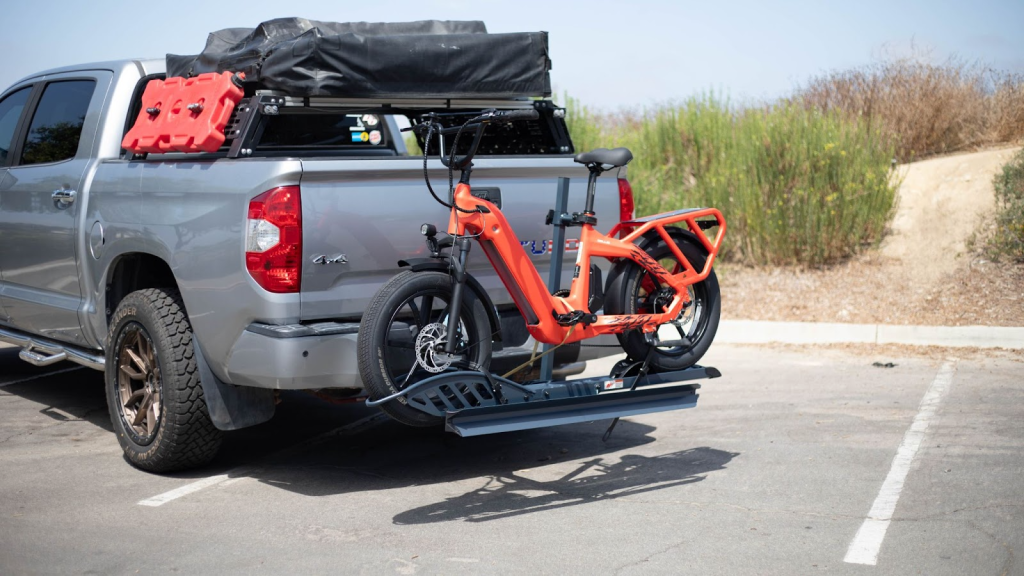
Before we dive into installation tips, it’s worth understanding why so many cyclists prefer a hitch bike rack over other solutions. Roof racks can be harder to load, especially for heavier bikes, and trunk racks often don’t offer the same level of stability. A hitch mount bike rack attaches directly to your vehicle’s hitch receiver, keeping the bikes low to the ground, easy to load, and very secure.
This design also reduces wind drag compared to roof racks, which can improve fuel efficiency. Plus, many modern racks come with tilt-away features that allow you to access your trunk without removing the bikes — a huge convenience for road trips.
Unlock hidden gems and tips tailored for you in this Related Post.
Step-by-step installation tips
Installing a hitch bike racks is usually straightforward, but there are a few steps you should follow to make sure it’s secure:
1. Check your hitch receiver
Before installing, verify that your vehicle’s hitch receiver is the correct size for your rack (typically 1.25” or 2”). A loose fit can cause rattling or instability, while an incompatible size simply won’t work.
2. Follow the manufacturer’s instructions
Each hitch mount bike rack has its own design and locking mechanism, so read the manual carefully. Skipping this step can lead to improper installation and risk damaging your rack or your bikes.
3. Secure the Rack Tightly
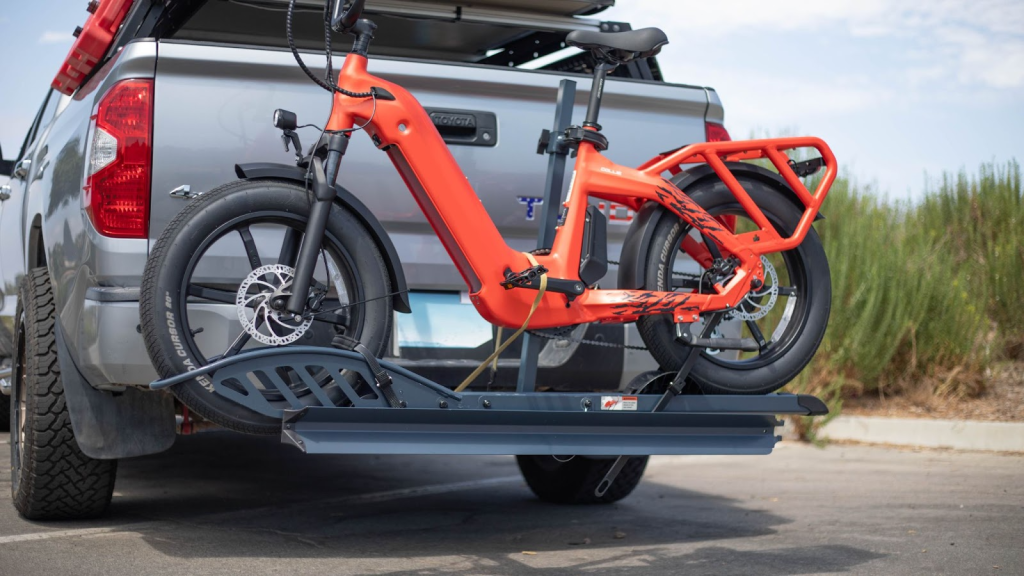
Use the provided bolts or locking pins to attach the rack firmly. If your rack includes an anti-rattle device, install it — this will keep the rack from swaying on bumpy roads.
4. Double-Check Stability
Once installed, give the rack a gentle shake to ensure it’s stable. This is one of the simplest yet most important steps before loading your bikes.
Loading and securing your bikes
Properly loading your bikes is just as important as installing the rack. Always place the heaviest bike closest to the car to reduce stress on the rack. Secure each bike using the provided straps, clamps, or wheel holders. For racks that hold bikes by the frame, make sure the clamps don’t press on cables or delicate components.
If you use a hitch mount bike rack that carries bikes by the wheels, check that the wheels are snug in the trays and locked in place. For extra peace of mind, consider using a cable lock to secure your bikes to the rack when leaving them unattended.
Maintenance tips for long-lasting performance
Like any piece of gear, your hitch bike rack needs regular care to stay in top condition. Here are some maintenance tips:
Clean After Road Trips
Road grime, salt, and dirt can build up on your rack and hardware. Wipe it down after each trip, especially if you’ve driven in rain or snow.
Lubricate Moving Parts
Apply a light lubricant to the bolts, locks, and moving joints of your hitch mount bike rack a few times per season. This prevents rust and keeps the tilt and folding mechanisms working smoothly.
Check for Wear
Inspect straps, clamps, and bolts regularly for signs of wear or damage. Replace any worn parts immediately to avoid a sudden failure on the road.
Store Properly
If you don’t plan on using your hitch bike rack for an extended period, remove it and store it in a dry, secure location. This protects it from weather damage and keeps it looking new.
Safety tips when using your rack
Even with proper installation, there are a few precautions you should take while driving with a hitch mount bike rack:
- Check clearance: Be mindful of the extra length added to your vehicle. This is crucial when parking or backing up.
- Secure loose items: Remove water bottles, pumps, and other accessories from your bike before driving.
- Drive cautiously: Avoid sudden braking or sharp turns, especially when carrying multiple bikes.
- Re-check straps: On long trips, stop every few hours to make sure straps and clamps are still tight.
Choosing the right rack for your needs
If you’re still shopping for a rack, think about the number of bikes you plan to carry, your vehicle type, and your budget. Some hitch bike rack models are designed for two bikes, while others can handle four or even five. Platform-style racks offer excellent stability, especially for heavy mountain bikes or e-bikes. Hanging-style racks are lighter and more affordable but may allow more movement between bikes.
When comparing hitch mount bike rack options, look for features like integrated locks, tilt-away functions, and compatibility with fat-tire or e-bikes if you own them. Spending a little extra upfront can save you frustration and protect your valuable bikes.
Final thoughts
A hitch bike rack or hitch mount bike rack is one of the most convenient and secure ways to transport your bikes for adventures near or far. By installing it correctly, maintaining it regularly, and following best practices for loading and driving, you’ll ensure years of safe, hassle-free use. Take the time to choose a rack that suits your needs, and you’ll spend less time worrying about your bikes and more time enjoying the ride.
Explore More content designed to transform the way you work and grow at 2A Magazine.