Lighting plays a crucial role in eCommerce photoshoots. It directly affects how products appear on screen, influencing customer perception and buying decisions. Poor lighting can make even high-quality products look dull or unattractive. On the other hand, well-executed lighting enhances colours, textures, and details, making products more appealing.
Unlike in-store shopping, customers can’t touch or feel products online. They rely on product images to assess quality and suitability. Bright, balanced lighting helps capture true colours and fine details, creating a sense of trust and transparency. Effective lighting also reduces shadows and glare, ensuring the product looks professional and consistent across different platforms.
Types of Lighting for eCommerce Photography
In an eCommerce photoshoot, different lighting setups produce varying effects. The type of lighting you use should match the product and desired style. Understanding the basic types of lighting helps create consistent and professional product images.
1. Natural Light
Natural light creates soft, even tones that work well for lifestyle and fashion products. Shooting near a large window or outdoors on an overcast day provides diffused light, reducing harsh shadows.
- Best for: clothing, accessories, and organic products
- Time of day matters; early morning and late afternoon light is softer and warmer
- Avoid direct sunlight to prevent harsh shadows and colour distortion
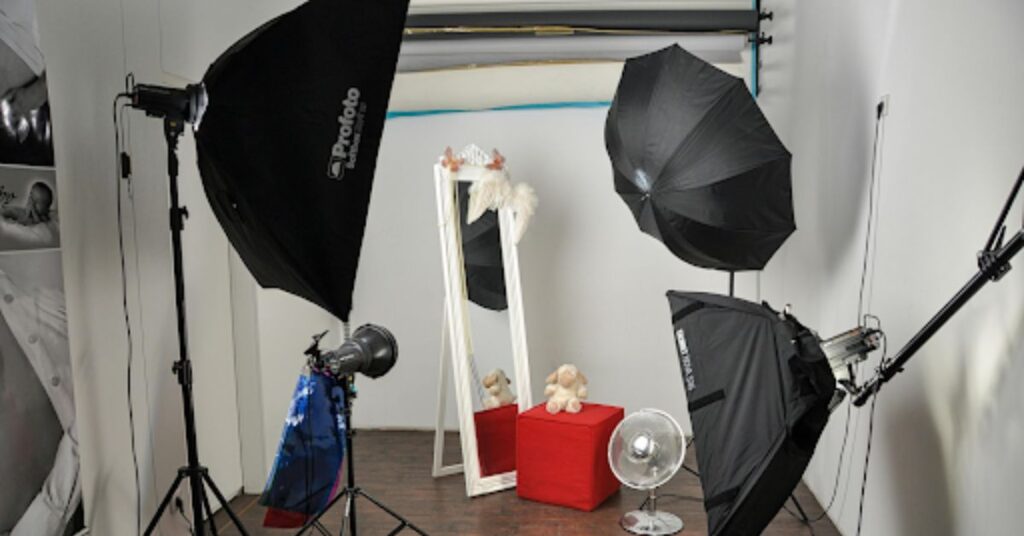
2. Softbox Lighting
Softbox lights create controlled, diffused lighting that mimics natural light. They’re ideal for indoor shoots, providing even illumination without harsh shadows.
- Best for: jewellery, cosmetics, and home decor
- Position the softbox at a 45-degree angle for balanced lighting
- Use multiple softboxes for a more uniform look
3. Ring Light
Ring lights produce even lighting with minimal shadows, highlighting product details. They work well for close-ups and small products.
- Best for: beauty products, small accessories, and electronics
- Ideal for enhancing texture and colour accuracy
- Place the product at the centre of the ring light for even illumination
4. LED Panel Lighting
LED panels offer adjustable colour temperature and brightness, making them versatile for different product types.
- Best for: food, electronics, and textiles
- Use diffusers to soften the light and prevent glare
- Adjust the colour temperature to match the product’s tone
Techniques to Improve Product Lighting
Proper lighting techniques can elevate product photos, making them more appealing and professional. A few key adjustments can significantly improve the outcome of your next eCommerce photoshoot.
1. Use Reflectors to Eliminate Shadows
Reflectors help bounce light onto the product, reducing harsh shadows. White foam boards or silver reflectors work well for this purpose. You have to position the reflector opposite the light source to fill in shadows and create balanced lighting.
2. Balance the Light Source
Mixing different light sources can create colour inconsistencies. Use bulbs with similar colour temperatures or rely on a single type of light for consistency. Note that warm and cool lights shouldn’t mix, as this can distort your product’s true colour.
3. Avoid Harsh Direct Lighting
Direct lighting creates strong shadows and highlights, which can make a product look uneven. Diffuse the light using softboxes, white sheets, or umbrellas to create a softer, more even glow.
4. Light from Multiple Angles
Position lights from different angles to eliminate shadows and highlight product details. A three-point lighting setup (key light, fill light, and backlight) creates depth and balance.
- Key light: Main source of illumination
- Fill light: Softens shadows from the key light
- Backlight: Separates the product from the background, adding depth
Common Lighting Mistakes and How to Fix Them
Lighting mistakes can reduce the quality of product photos, making them less appealing to customers. Being aware of these common issues, so you can achieve better results:
- Uneven lighting – When one side of the product is brighter than the other, adjust the light positions or increase the fill light.
- Harsh shadows – If shadows are too dark, use a diffuser or soften the light source.
- Colour cast – Mixing warm and cool lights causes colour shifts. Stick to one type of light temperature.
- Glare on reflective surfaces – Adjust the light angle or use a polarising filter to reduce glare.
- Overexposure – Bright spots can wash out details. Lower the light intensity or adjust camera settings.
Enhancing Product Appeal Through Lighting
More than improving image quality, good lighting enhances product appeal. Products photographed under balanced, professional lighting appear more premium and trustworthy. Customers are more likely to engage with and purchase products that look sharp and well-lit.
Lighting also sets the mood. Warm tones create a cosy feel, while cool tones suggest modernity and sophistication. Adjusting the lighting style to match the product’s target audience can influence buying behaviour.
Why Lighting Techniques Matter for eCommerce Success
Lighting isn’t just about brightness—it’s about creating a visual experience that guides customers’ decisions. When your product images look clear, vibrant, and consistent, customers feel more confident about their purchase. Professional lighting techniques highlight a product’s best features, enhancing its perceived value.
Consistent lighting across a product catalog also strengthens brand identity. Customers recognise a brand not only by its products but by the consistent look and feel of its imagery. Mastering lighting techniques leads to stronger customer trust, higher conversion rates, and reduced product returns.