Step into a space where walls don’t just sit there, they glow, guide your eyes, and shape how you feel. That shift is not random. It comes from careful use of backlit structures that blend light with surface design. I’ve seen a plain retail wall turn into a focal point just by adding a lit fabric panel. The image stayed the same, but the impact changed fast. Why does this happen? Because light, when controlled well, changes depth, tone, and focus. If you want surfaces that do more than cover space, this approach is worth close attention.
Role of Light-Integrated Surfaces in Interior and Architectural Design
Light-integrated surfaces change how people read a space. A standard wall reflects light. A backlit surface emits it. That one shift creates depth and draws attention without extra objects.
In interior projects, these systems often act as visual anchors. For example, in retail, a lit wall can guide customer flow. In offices, soft light panels reduce harsh contrast and improve comfort.
Key effects include:
- Better focus: Eyes move toward lit areas first
- Mood control: Soft light reduces strain compared to direct fixtures
- Space perception: Even light makes rooms feel larger
From my own work with display walls, I’ve noticed that placing a lit panel at eye level increases viewer attention by a clear margin. It’s not just design—it’s behavior.
Types of Backlit Structural Systems
Backlit systems come in several forms, each with a clear role. Choosing the right one depends on scale, budget, and visual goal.
Fabric-based systems are widely used. A common example is the seg lightbox display, where printed fabric fits into a frame with a silicone edge. This setup keeps the surface smooth and allows even light spread. It works well for large walls and retail spaces.
Other system types include:
- Rigid panel systems: Acrylic or glass panels with printed layers. These provide a clean, solid look and high durability.
- Modular panel units: Smaller sections combined into one large surface. These are useful for ceilings or long walls.
- Edge-lit panels: Light enters from the sides and spreads across the surface through a guide layer.
Each system has its place. From experience, fabric systems are easier to install and replace, while rigid panels suit long-term builds.
Material Properties and Light Behavior
Material choice defines how light behaves across the surface. This is not guesswork it follows clear physical rules.
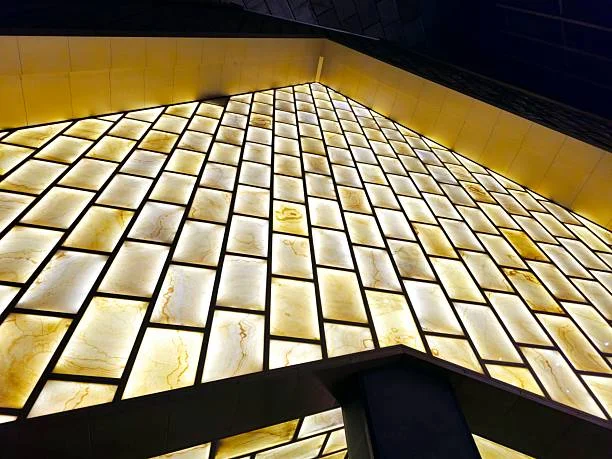
First, light transmission rate matters. Most backlit fabrics allow about 60–70% of light through. Films can go higher, but they often reduce diffusion. If too much light passes without spread, hot spots appear.
Second, surface texture affects how light scatters. A fine textile weave breaks light into many directions, which creates a soft and even look. Smooth surfaces, like clear acrylic, need added diffusion layers to avoid sharp glare.
Third, color response under light is critical. Colors look brighter when lit from behind, but they can also shift. Dark tones may block light, while light tones may appear washed out. That’s why print adjustment is needed before production.
Other key factors include:
- Heat resistance: LED systems can reach 40–60°C over long use
- Material stability: Fabric must stay tight to avoid distortion
- Light uniformity: Even spread depends on both material and light setup
In one project I worked on, switching from thin film to textile reduced visible hot spots by more than half. The image looked softer, and the space felt more balanced. Small material changes can lead to clear visual results.
Design Planning for Backlit Surfaces
Strong results start long before installation. Design planning defines how the surface will look, how light will behave, and how the space will feel. I’ve seen projects fail not because of poor materials, but because the image and layout were not adapted for backlighting.
Start with image preparation. Files must be adjusted for light output:
- Increase contrast by 15–25% to avoid flat visuals
- Avoid large dark areas that block light
- Use smooth gradients to prevent visible bands
Next comes scale and placement. A panel that is too small gets lost. Too large, and it overwhelms the room. A good rule: the display should cover 30–60% of the main wall for balanced impact.
Then consider integration with the space. Backlit panels should align with furniture, wall lines, and natural light sources. When used with seg graphic frames, alignment becomes easier because the frame keeps edges clean and straight.
Ask yourself: does the panel guide attention, or does it compete with the space? That answer shapes the final design.
Light Source Selection and Setup
The light source defines the final look as much as the print itself. Even a perfect image can fail under poor lighting.
LED systems are the standard choice due to low power use and stable output. Most backlit panels use LEDs with a lifespan of 30,000 to 50,000 hours.
Key setup factors include:
- Distance from surface: 8–15 cm helps avoid hot spots
- Color temperature: 5000K to 6500K keeps colors neutral
- Light type: panels for even spread, strips for flexible layouts
In seg graphic frames, many systems come with built-in LED layouts. This reduces setup time and improves consistency across the surface.
Installation Methods and Structural Support
Installation influences the visual quality and durability. An improper installation may result in unequal light distribution, stress on materials, and premature wear.
Frames that are mounted on the wall are the most widespread. They offer constant support and definite alignment. Large scale overhead panels or ceiling systems do well. Exhibitions usually require free-standing units to move freely.
Important aspects to consider during installation:
- Frame should be straight to avoid an imbalance of tension.
- Fabric or panel must be evenly stretched
- The inside area should permit the release of heat.
The silicone edge is used to ensure that the material is tight without tools with systems such as seg graphic frames. This minimizes errors in setting up and also provides a clean and flat surface which supports a uniform distribution of light.
Expand your horizons. See what else we’ve been buildin at 2A Magazine.