Floor refinishing is an art and science that can breathe new life into tired, worn-out flooring. Whether you’re dealing with hardwood, parquet, or even engineered wood floors, the process of refinishing can restore their natural beauty and extend their lifespan by decades. This comprehensive guide will walk you through the intricacies of floor refinishing, providing you with the knowledge to achieve stunning results every time.
Understanding the Basics of Floor Refinishing
Floor refinishing is a process that involves sanding down the top layer of a wooden floor to remove scratches, dents, and old finishes. Once the wood is smooth and clean, new stain and finish are applied to protect the wood and enhance its natural beauty. This process can dramatically transform the appearance of a room, making it look fresh and new without the need for complete floor replacement. The history of floor refinishing dates back to the early 20th century when power sanders were first introduced.
Before that, floors were typically sanded by hand, a laborious and time-consuming process. The advent of mechanical sanders revolutionized the industry, making it possible to refinish floors more quickly and efficiently. Hardwood floor refinishing in Vancouver is an excellent way to breathe new life into your home’s interior without the cost of replacing the entire floor. With Vancouver’s unique climate, proper refinishing helps protect hardwood floors from moisture and wear, ensuring they last for years. This service is especially popular for maintaining the charm and durability of older homes in the region.
When to Consider Floor Refinishing
Knowing when to refinish your floors is crucial for maintaining their beauty and integrity. Here are some signs that indicate it might be time for a refinishing project:
- Visible wear and tear: If your floors have deep scratches, dents, or gouges that can’t be hidden with a simple polish, refinishing might be necessary.
- Discoloration: Sun exposure and age can cause wood floors to fade or develop an uneven colour. Refinishing can restore a uniform appearance.
- Water damage: Small areas of water damage can often be addressed through refinishing, though extensive damage may require board replacement.
- Roughness: If your floors feel rough to the touch or snag socks, it’s a sign that the protective finish has worn away.
- Grayish colour: When wood is exposed to air and moisture without protection, it can develop a grayish tint. This is a clear indication that refinishing is needed.
It’s important to note that solid hardwood floors can typically be refinished 6–8 times over their lifespan, which can extend well over a century with proper care. Engineered wood floors, on the other hand, usually can only be refinished 1–3 times, depending on the thickness of the top wood layer.
The Floor Refinishing Process
1. Preparation
Proper preparation is key to achieving beautiful results in floor refinishing. This stage involves:
- Removing all furniture and objects from the room
- Sealing off the area to prevent dust from spreading to other parts of the house
- Repairing any damaged boards or filling in gaps between planks
- Ensuring proper ventilation, as many refinishing products release fumes
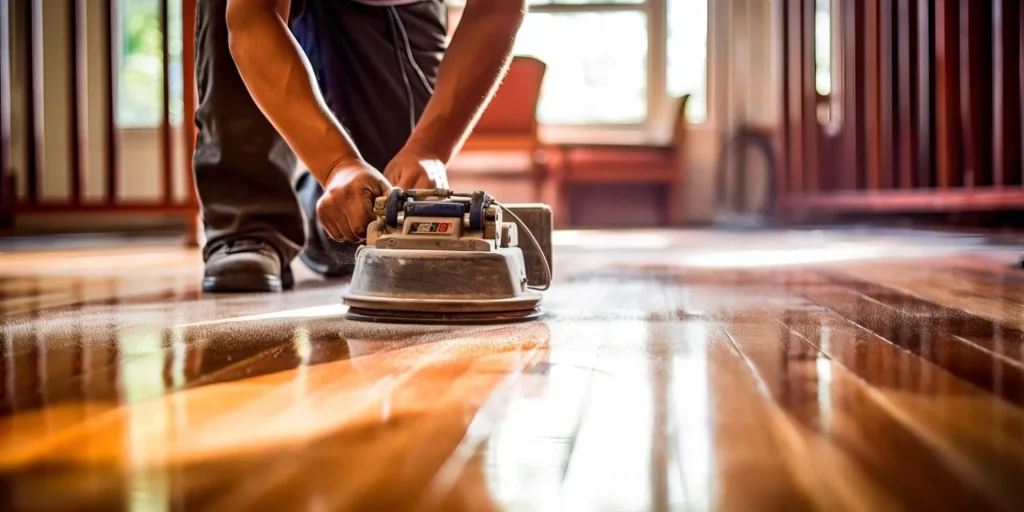
2. Sanding
Sanding is perhaps the most critical step in the refinishing process. It involves using progressively finer grits of sandpaper to remove the old finish and smooth out the wood surface. This is typically done in three passes:
- Coarse grit (36-60) to remove the old finish and level the floor
- Medium grit (80-100) to smooth out the scratches left by the coarse grit
- Fine grit (120-150) for final smoothing before staining
Proper sanding technique is crucial to avoid creating dips, waves, or swirl marks in the floor. Professionals often use a combination of drum sanders for large areas and edging sanders for corners and edges.
3. Cleaning
After sanding, it’s essential to thoroughly clean the floor to remove all dust and debris. This is typically done through a combination of vacuuming and tack cloth wiping. Any dust left on the floor can interfere with stain absorption and finish adhesion.
4. Staining (Optional)
Staining is an optional step that allows you to change or enhance the colour of the wood. When choosing a stain, consider:
- The natural colour and grain of the wood
- The overall style and colour scheme of your home
- The amount of natural light in the room
It’s always wise to test stain colours on a small, inconspicuous area of the floor before committing to a full application. Stain is typically applied with a brush or rag, allowed to penetrate the wood for a specific time, and then wiped off to achieve the desired colour intensity.
5. Applying Finish
The final step in the refinishing process is applying a protective finish. This not only enhances the beauty of the wood but also protects it from wear, moisture, and stains. Common types of finishes include:
- Polyurethane (oil-based or water-based)
- Varnish
- Shellac
- Natural oils (like tung oil or linseed oil)
Each type of finish has its pros and cons in terms of durability, drying time, odour, and sheen level. Water-based polyurethane, for instance, dries quickly and has low odour but may not be as durable as oil-based options. Oil-based polyurethane, on the other hand, is extremely durable but takes longer to dry and has a strong odour.
Most finishes require multiple coats, with light sanding between coats for optimal adhesion. The number of coats can vary depending on the product and desired level of protection, but typically ranges from 2 to 4 coats.
Achieving Beautiful Results: Tips and Tricks
To ensure your floor refinishing project yields stunning results, consider these professional tips:
- Don’t rush the process: Each step, from sanding to drying, takes time. Rushing can lead to subpar results.
- Pay attention to the weather: Humidity and temperature can affect how stains and finishes dry. Ideal conditions are typically between 60-80 °F with 35-55% relative humidity.
- Use the right tools: Quality sanders, applicators, and brushes can make a significant difference in the final result.
- Sand with the grain: Always sand in the direction of the wood grain to avoid cross-grain scratches.
- Vacuum between sandings: This prevents coarse grit particles from scratching the floor during finer sanding passes.
- Use a wood conditioner: Applying a pre-stain wood conditioner can help ensure even stain absorption, especially on woods prone to blotchiness like pine or maple.
- Apply thin coats: Whether staining or finishing, thin, even coats typically yield better results than thick applications.
- Allow proper drying time: Don’t rush to apply the next coat or to move furniture back into the room. Most finishes need at least 24 hours to dry and up to 30 days to fully cure.
Environmental Considerations
In recent years, there has been a growing emphasis on using environmentally friendly products in floor refinishing. Many manufacturers now offer low-VOC (Volatile Organic Compound) or zero-VOC stains and finishes. These products release fewer harmful chemicals into the air, making them safer for both the environment and the occupants of the home.
Additionally, some homeowners are opting for natural oil finishes like tung oil or linseed oil. While these may not be as durable as polyurethane, they are renewable, allowing for easy spot repairs without the need for full refinishing.
The Value of Professional Refinishing
While floor refinishing can be a DIY project for skilled homeowners, there are significant benefits to hiring a professional:
- Experience in assessing floor condition and recommending the best course of action
- Access to professional-grade equipment, which can provide superior results
- Knowledge of the latest products and techniques
- Ability to handle unexpected issues that may arise during the process
- Time savings, as professionals can complete the job more efficiently
Professional floor refinishers also have the expertise to work with a variety of wood types and can often salvage floors that a DIY enthusiast might deem beyond repair.
Maintaining Your Newly Refinished Floors
Once your floors are beautifully refinished, proper maintenance is key to preserving their beauty:
- Use felt pads under furniture legs to prevent scratches
- Clean spills promptly to prevent staining or water damage
- Sweep or vacuum regularly to remove abrasive dirt and debris
- Use manufacturer-recommended cleaning products
- Consider using area rugs in high-traffic zones to reduce wear
With proper care, your refinished floors can maintain their beauty for many years before needing another refinishing.
Conclusion
Floor refinishing is a transformative process that can dramatically enhance the beauty and value of your home. By understanding the steps involved, from preparation to final finishing, you can achieve stunning results that will be admired for years to come. Whether you choose to tackle the project yourself or hire a professional, the key to beautiful results lies in patience, attention to detail, and a commitment to quality at every stage of the process. With the right approach, your refinished floors will become a source of pride and enjoyment, adding warmth and character to your living space for decades to come.