The thought of replacing the tail light assembly in your truck may intimidate you, but it is a handy skill that can save you time, and money turning your truck road legal and safe. This guide equips you with step by step instructions to change the tail light assembly of your truck with assurance, even with your lack of experience in being a mechanic. After this tutorial, you should know how to go about the task, what tools are required and how to make a secure, solid installation.
Why it is important to Replace a Tail Light Assembly?
Tail light assembly replacement comprises more than just beautification of your vehicle; it gets to your safety and right to the law. Working tail lights have improved visibility at night when visibility has deteriorated and pedestrians are safe since they indicate your direction. Other than safety, tail lights are mandatory in all vehicles as per the state and federal laws. A tail light that is broken or faulty will lead to fines or even violations when driving.
List of Tools and Materials You Will Require
All the difference in replacing your truck tail light assembly can be achieved by the right tools. A toolbox that needs to be prepared will consist of some basic tools to carry out most jobs, like a set of screwdrivers or a socket set. Do not forget to get the new replacement assembly especially made to fit your model of a truck. Remember that safety is the first item of business, it should do everything to protect yourself by wearing hand gloves and safety glasses.
There are also some optional tools which can be also useful. As an example, the wiring harness contains electrical connectors which should not be allowed to corrode by moisture: this can be prevented by application of dielectric grease. Panel removal tools are also useful when you just want to take off any panels on your truck and not damaging them. Before you begin, assemble all the materials and tools you will need; it will make the whole process of installation smooth and faster.
Step 1:Find and Buy the Right Replacement
The initial thing that you should do in the replacement process of the tail light assembly of your truck is to get the right replacement part. It is better to start with the make, model, and the year of your truck and these details will make a new part a perfect fit. You can check your truck owner manual or by checking the specifications of the truck using the Vehicle Identification Number (VIN).
Still curious? Here’s another read we think you’ll love.
Step 2: Open the Tail Light Assembly at Hand
In order to commence with the replacement process, you need to get access to the current tail light assembly. Open the tailgate or truck trunk to start. Find the screws or clips holding in place the tail light assembly. These are normally located on the inner face of the assembly or beneath removable caps.
Step 3: Wash the Old Assembly away
Having exposed the tail light assembly pulls it out of the truck carefully. In case the assembly is not released instantly, check whether there are some concealed clips or screws fixing the assembly. Do not apply excessive force since it may end up causing damage to the adjacent parts.
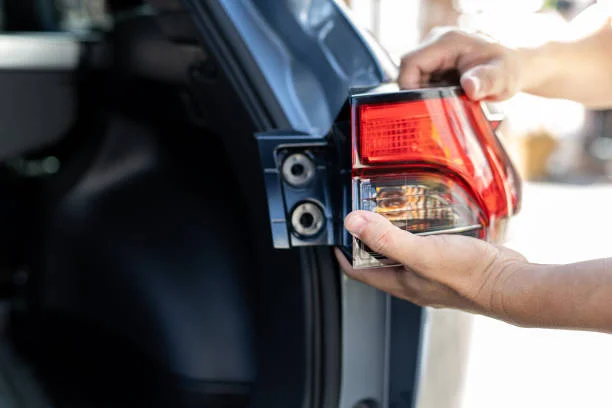
Step 4 The New Tail Light Assembly
Then put the new assembly to the mounting location, making sure that it fits in the mounting location and fits precisely with the screw holes and the guiding pins. Gently push the assembly towards the place with care not to jingle the wires or connectors.
Fix the assembly by means of the screws or the clips you loosened above. Compress them equally so as not to disrupt the housing, and to allow the fitting such that the screws strike securely. After the assembly is firmly fixed, then it should be checked to be aligned properly and the housing should be flush with the body of the truck to ensure weatherproofing.
Step 5: Test and Finalise
The new tail light assembly is one of the parts that need to be tested, before the job is considered complete. Make someone check all the functions of it i.e. brake lights, turn signals and reverse lights. In a case that some of the features fail to operate as desired, check on the wiring connection to make sure they are fixed firmly.
Once it has been verified full functionality – the last thing to do is to re-tighten all the screws to make it fit snug. In case you have stacked off some panels or covers during the installation, you should reinstall it in a very efficient way to avoid scratching or even damaging the finish of the vehicle.
Aftercare Advice
The maintenance is going to extend the lifespan of your new tail light assembly and make it reliable. It is recommended to develop a routine of cleaning the lens that may be dirty over time or get grime stains. Inspecting it to ensure that it is not condensing and ensuring that things are not connected loose could also aid you check problems before they blow up to more troublesome levels.
You’ll find even more guides and resources on 2A Magazine.